I've been working on a random selection of stuff this week, as well as teaching 5 children's classes (separate blog post coming up)
Mt temperature embroidery is now over 2 metres long, and has already outgrown its wooden bobbin so I'm going to have to rethink its "home"!
I can only show it in a loose coil, so here are 5 lengths
and here are the alternate lengths
For quite a while now I've only been using the "hot" colours - lovely!!!!
I have finished the binding on this brick wall I-spy quilt,
And on this Mickey Mouse one. names can be added as appropriate
Thanks to Sharon who gifted me some rainbow cork I made a cork travel bag - room for change in the front pocket, passport, glasses and phone in the main pocket, and boarding pass in the real vinyl pocket, plus a front zipped pocket under the flap, and a rear zipped. I didn't line it, and I constructed it wrong sides together - just zigzagging over the sides and the edge of the flap with a rainbow variegated thread, I'm in love!
We made a crazy patch at the last Richmond and Kew Quilters meeting, with the idea we would decorate it at September's meeting. I'm going to be away for Septembers, and Avril was away for the last weeting so I handed my block over to her. In fact she might have to miss September's meeting too so she's already started decorating her / my / our patch: looking good Avril!
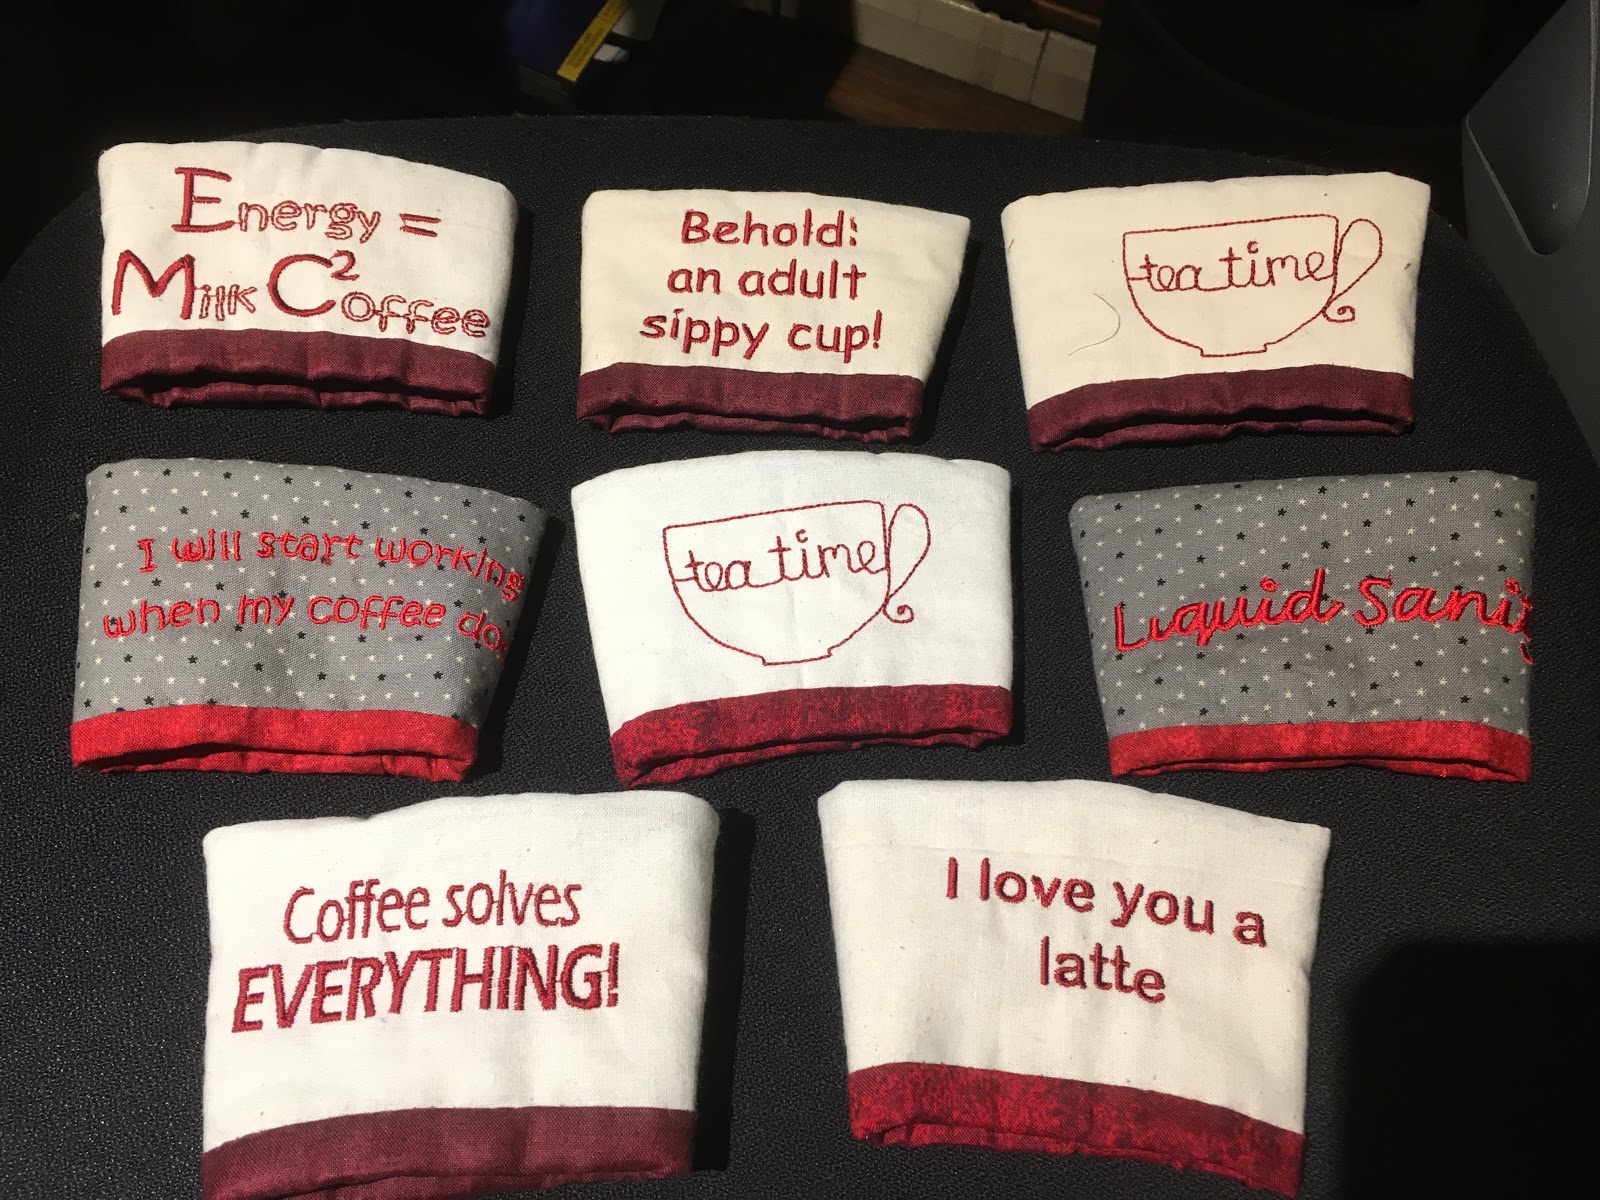
And Lizzy has been helping me make some coffee wraps: We've been having fun ready for the Church summer fair next Saturday
I started this blog for me - it expanded to show BFF Jackie what I was doing - and a few others have invited themselves too - everybody welcome! Mostly about patchwork, with random comments about embroidery, family and life in general, come on in, put your feet up, and I'll put the [virtual] kettle on.
Showing posts with label travel purse. Show all posts
Monday, August 26, 2019
Sunday, July 7, 2019
2019 Wk 27 - Travel pouch - comments welcome!
This was inspired by a number of small handbags that I have been given or have made, but it is my own design. I'm really pleased with it and want to make more so the instructions are here to remind me, but feel free to have a go. (And if you do, do let me know how you get on with it!)
The pouch has a vinyl front pocket (passport or ID?) a zipped front pocket (cash ?) a big inner pockets for mobile and glasses and a back zipped pocket (for credit cards?)
I started with a piece of denim recycled from a pair of jeans (NB - dont use stretch denim next time!) I cut it to 18 (second try I cut to 20") x 6.5" and rounded the corners at one end (using a drinking glass). I will later cut a piece from lining fabric, but that can wait until the denim piece is ready
I cut 1.5" off the end with original corners to make a pocket
To make the front pocket
Cut two pieces lining fabric 6.5 x 7
I used a zip that was more than 6.5" and added it to one of the pieces of cut denim and pocket (zip front to right side of denim, zip back to right side of lining)
Stitch, flip over both fabrics, finger press (because I'm lazy) and top stitch
repeat with the other piece of cut denim
To make the vinyl pocket:
Cut a piece of trimming fabric 2 x 14". Fold in half along the length and press, then fold the long edges in to meet the pressed line and press in place. Cut a piece of vinyl 5.5" x 7".
Slide the long edge of the vinyl into the folded opening, and stitch the trim over the vinyl. The extra 7" will be used later, stitch along the long edge so it doesn't open
Place pins at a point 8" from the squared ends. Stitch vinyl to denim (with trim towards rounded ends)
Flip vinyl over (you could pin or clip it into place: if using pins only pin through the fabric not the vinyl)
To make the rear pocket: Cut a 4" piece of denim off the rounded ends. Insert zip as with front zip pocket
Stitch the bottom of both pockets and trim excess fabric (it was easier than trying to work out which side needed to be longer than the other!!!)
Back of denim
Front of denim
Lay the denim out flat and measure it so you can cut a piece of lining exactly the same size.
Pin, clip or tack half an inch at the squared end (wrong sides together). I found it folded neatly around the zip (*)
Move the zipper pulls to the middle of the zip.
Hey you - at the back - yes you, the one not paying attention: MOVE THE ZIPPER PULLS TO THE MIDDLE OF THE ZIP. Trimm off the zip ends in line with the denim. Try *really* hard not to absentmindedly pull the zip to open or close it yet
Fold, flipping the rounded end on top of the vinyl, using the vinyl-to-denim stitching as the fold line (left below) and fold the lining the same (remember to fold down the end of the lining to match the denim (not shown). If you flip them over they look like this
Make 2 small lengths of strap from small D rings and the excess vinyl binding earlier, or use ribbon. If you don't have D rings you could just use the strap.
Place these at the sides, in line with the zip above the vinyl pocket: strap raw edges match the raw edges on the denim piece, and D rings and straps laying against the zip (as shown)
Now flip the lining piece onto the denim piece so the shorter sections are wrong sides together. Check in the middle of the sandwich - the folded (maybe pinned, clipped or tacked) straight edged ends (shown in red) need to be touching and matching (*)
And breathe!!!
Now - stitch around the 3 raw edges! No turning gap needs to be left as you created one at (*)
I was too lazy to make rounded corners on my lining so I stitched from the denim side and trimmed the corners after. Carefully cup into the convex curves - these will finish as concave so they need little triangles cut from the raw edge to *almost* the seam
Now find the opening with the folded (tacked, clipped or pinned?) ends, and pull the whole lot through there. It may well need some re-adjusting but you should end up with this
Slip stitch the opening closed
I made a strap using rope folded at the end around a small lobster clasp and used embroidery thread to hold it all closed (this method) and tada!!!!
However (drat and fiddlesticks) the flap doesn't fold over enough, so the next version will have slightly longer measurements. I'll have a go at using KAM press studs / poppers when I get a chance
And then I made another one with different pockets!
The pouch has a vinyl front pocket (passport or ID?) a zipped front pocket (cash ?) a big inner pockets for mobile and glasses and a back zipped pocket (for credit cards?)
I started with a piece of denim recycled from a pair of jeans (NB - dont use stretch denim next time!) I cut it to 18 (second try I cut to 20") x 6.5" and rounded the corners at one end (using a drinking glass). I will later cut a piece from lining fabric, but that can wait until the denim piece is ready
I cut 1.5" off the end with original corners to make a pocket
To make the front pocket
Cut two pieces lining fabric 6.5 x 7
I used a zip that was more than 6.5" and added it to one of the pieces of cut denim and pocket (zip front to right side of denim, zip back to right side of lining)
Stitch, flip over both fabrics, finger press (because I'm lazy) and top stitch
repeat with the other piece of cut denim
To make the vinyl pocket:
Cut a piece of trimming fabric 2 x 14". Fold in half along the length and press, then fold the long edges in to meet the pressed line and press in place. Cut a piece of vinyl 5.5" x 7".
Slide the long edge of the vinyl into the folded opening, and stitch the trim over the vinyl. The extra 7" will be used later, stitch along the long edge so it doesn't open
Place pins at a point 8" from the squared ends. Stitch vinyl to denim (with trim towards rounded ends)
Flip vinyl over (you could pin or clip it into place: if using pins only pin through the fabric not the vinyl)
To make the rear pocket: Cut a 4" piece of denim off the rounded ends. Insert zip as with front zip pocket
Stitch the bottom of both pockets and trim excess fabric (it was easier than trying to work out which side needed to be longer than the other!!!)
Back of denim
Front of denim
Lay the denim out flat and measure it so you can cut a piece of lining exactly the same size.
Pin, clip or tack half an inch at the squared end (wrong sides together). I found it folded neatly around the zip (*)
Move the zipper pulls to the middle of the zip.
Hey you - at the back - yes you, the one not paying attention: MOVE THE ZIPPER PULLS TO THE MIDDLE OF THE ZIP. Trimm off the zip ends in line with the denim. Try *really* hard not to absentmindedly pull the zip to open or close it yet
Fold, flipping the rounded end on top of the vinyl, using the vinyl-to-denim stitching as the fold line (left below) and fold the lining the same (remember to fold down the end of the lining to match the denim (not shown). If you flip them over they look like this
Make 2 small lengths of strap from small D rings and the excess vinyl binding earlier, or use ribbon. If you don't have D rings you could just use the strap.
Place these at the sides, in line with the zip above the vinyl pocket: strap raw edges match the raw edges on the denim piece, and D rings and straps laying against the zip (as shown)
Now flip the lining piece onto the denim piece so the shorter sections are wrong sides together. Check in the middle of the sandwich - the folded (maybe pinned, clipped or tacked) straight edged ends (shown in red) need to be touching and matching (*)
And breathe!!!
Now - stitch around the 3 raw edges! No turning gap needs to be left as you created one at (*)
I was too lazy to make rounded corners on my lining so I stitched from the denim side and trimmed the corners after. Carefully cup into the convex curves - these will finish as concave so they need little triangles cut from the raw edge to *almost* the seam
Now find the opening with the folded (tacked, clipped or pinned?) ends, and pull the whole lot through there. It may well need some re-adjusting but you should end up with this
Slip stitch the opening closed
I made a strap using rope folded at the end around a small lobster clasp and used embroidery thread to hold it all closed (this method) and tada!!!!
However (drat and fiddlesticks) the flap doesn't fold over enough, so the next version will have slightly longer measurements. I'll have a go at using KAM press studs / poppers when I get a chance
And then I made another one with different pockets!
Sunday, March 31, 2019
2019 Wk 13 - weekend with Jackie
Thank you Jackie for a great weekend - two full days of sewing and a day with the family
We made these pods (from here)
And sorted these old EPP Australian Starred hexies that stagnated about 5 years ago
And made these great Hello Pouches (can you see that the top half is vinyl?)
Does that help?
And had a great morning at Stitch - 22 of us altogether including three generations from one family
A video from Stitch
And we made these Charm tote bags (thank you Amo for the charm squares, they went perfectly with this petrol teale)
And these travel purses with credit card slots, a zip pocket, two slip pockets and a velcroed vinyl pocket
We also made a bag for Lisa's necessary essentials
And admired her ferris wheel crochet
We both got rather spoiled by the girls for Mothering Sunday
And they made me a momento frame with tickets and photos from our trip to NY earlier this year
These were from a class I taught last week. Pincushions with a scissor pocket.
We made these pods (from here)
And sorted these old EPP Australian Starred hexies that stagnated about 5 years ago
And made these great Hello Pouches (can you see that the top half is vinyl?)
Does that help?
And had a great morning at Stitch - 22 of us altogether including three generations from one family
A video from Stitch
And we made these Charm tote bags (thank you Amo for the charm squares, they went perfectly with this petrol teale)
And these travel purses with credit card slots, a zip pocket, two slip pockets and a velcroed vinyl pocket
We also made a bag for Lisa's necessary essentials
And admired her ferris wheel crochet
We both got rather spoiled by the girls for Mothering Sunday
And they made me a momento frame with tickets and photos from our trip to NY earlier this year
These were from a class I taught last week. Pincushions with a scissor pocket.
Subscribe to:
Posts (Atom)
July 2026
So July has now gone: I always thought August was the hottest month but I really hope not! I'm happy up to about 25 degrees, but this ...
-
I finally seem to have a month where I can show some making Jackie came over and we went to Festival of Quilts with Lisa and did some sewin...
-
Hi thanks for coming to the new blog!! This week I have been crocheting . . . (no idea why the bottom line isn't straight) I'm lovi...
-
I have a hexies and triangles project I work on at mother-in-law's. I had an idea for an arrangement: there is a blue owl in the centre ...