Showing posts with label weft and warp. Show all posts

Tuesday, January 1, 2019

2019 - Wk 0 - Happy New Year

I've been playing with Lizzie!  I got an urge to design (while she was stitching badges for the local scouts who deliver local Christmas cards)

My cousin has three gorgous grandchildren, so I got their mum to send me photos of some artwork and their "signatures".

And I converted them to stitches

 Mila's drawing and my embroidery

And Matteo's

And their little brother Luka didn't do a picture but I got his name.  I think I need to re-stitch it as the colours are off.


I think a few drawstring bags are on the agenda for tomorrow then they can go off in the post!

I have also finished warping the loom for the Temperature project.  Finished warping AND prepared the threads for the lower range of temperatures


AND deciding on the threads for the warmer colours!

And I've finally finished (just need to trim to size, so OK not actually finished!) a few tiny blocks - Jackie, how are yours coming along?


Friday, December 28, 2018

2018 Wk 52 Christmas part 1


Hope you had a very . . .

We did! 

M-i-L sadly missing from the Boxing Day festivities but she was very well looked after in hospital with a visit from Santa, gifts of a scarf and a box of chocs and a card from a local school child.

With the festivities over and all the waifs and strays back at their own homes I've actually done some "me" things!

A whole load of 1½ squares have been stitched first in pairs, then in 3s

and now being stitched into 9 patches for the Tiny Blocks quilt Jackie and I are making.


 I am also warping a loom: Have you seen the temperature quilts that people made last year?

You knit or crochet a set number of stitches in a colour that represents a temperature, then you do the same every day.  You can choose whether you use the maximum or minimum or average, just pick one and stick to it.  One of my students from many years ago is a very accomplished crochetter: she blogs at https://lullabylodge.blogspot.com and is cheerleading a crocheted blanket along (!) starting here.  I really wanted to have a go but I'm already thrown by the crochet tech talk, and don't have much in the way of wool colours . . .  however I have plenty of embroidery threads and have no objection to buying any extras needed so I am doing a woven equivalent.

Warping a loom has to count as one of the most boring craft preparations though - which is why I've done half then got distracted by doing my tax return and a blog post!

 I also got very spoiled - pressie pics will follow


Friday, May 15, 2015

Wefting and Warping and Weaving

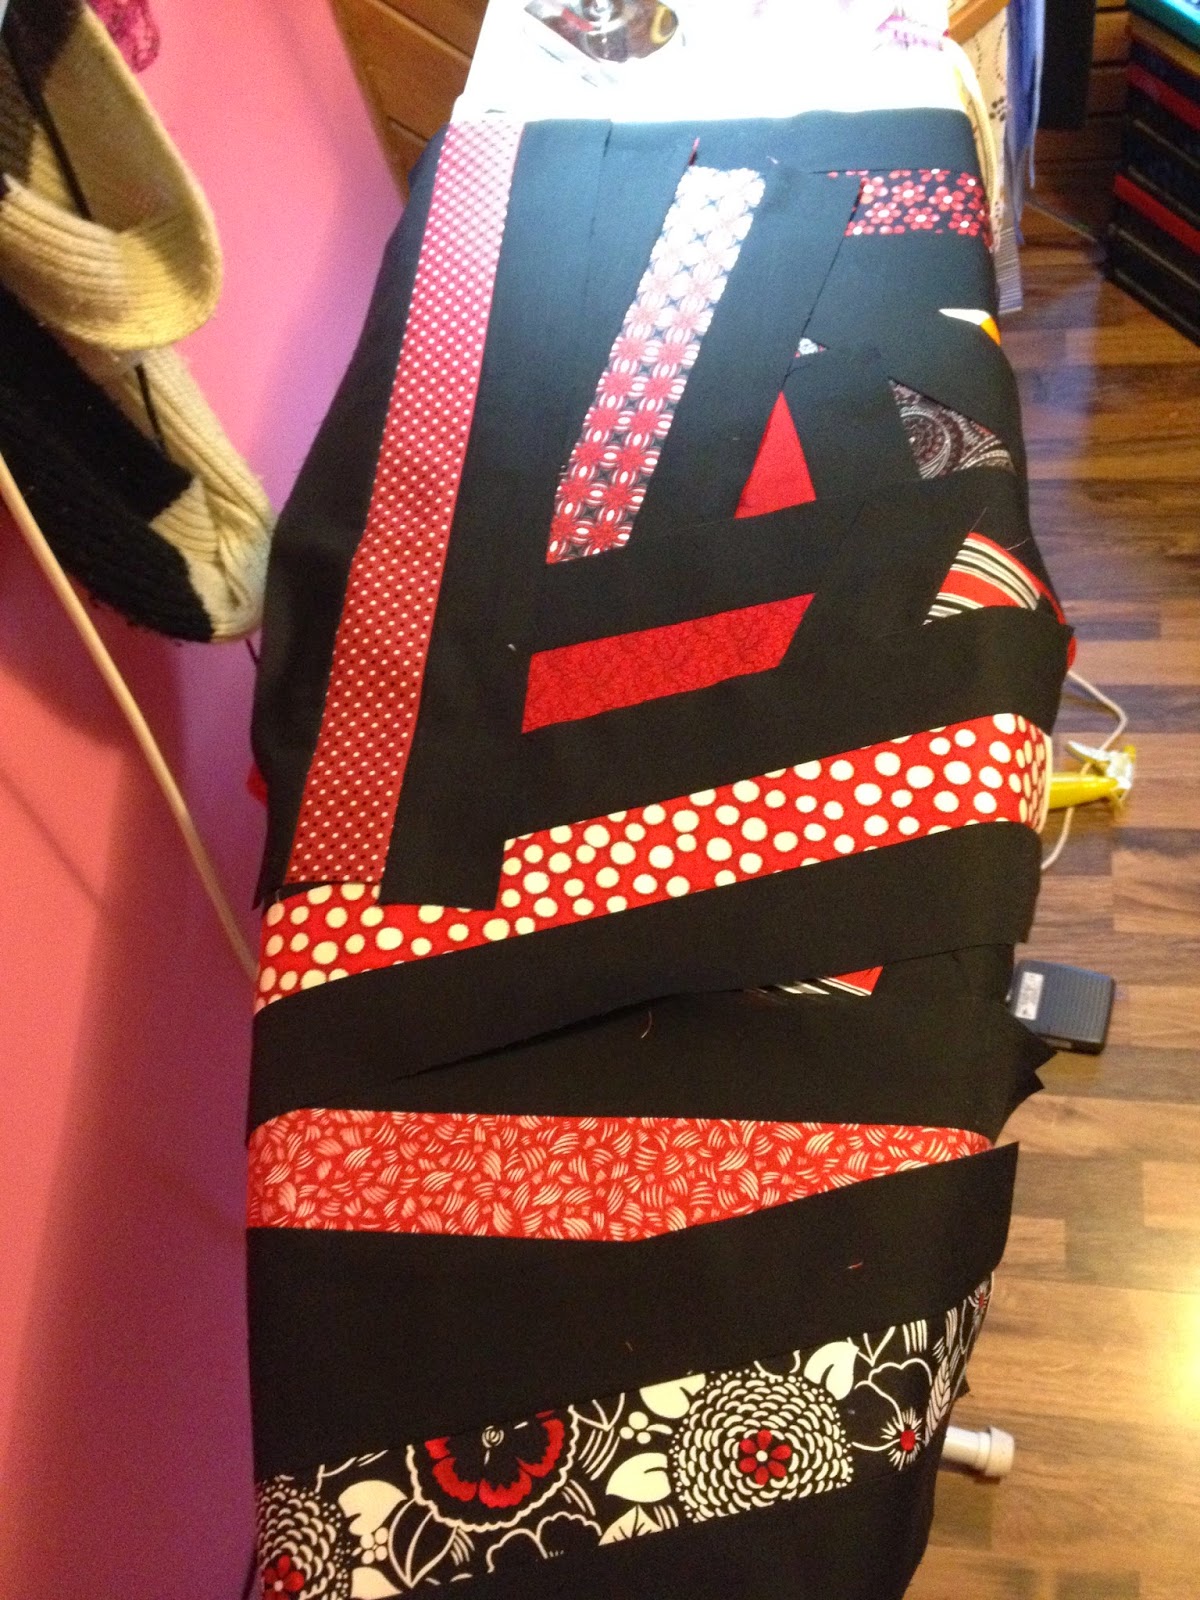
I'm gradually getting the hang of this woven quilt.  I'm adding instructions here for myself for when I make another one, but of course they are for anyone else to use too.

I'm going to refer to weft and warp - if you have problems remembering which is which this may help:

wEFT goes right to LEFT

while warP goes toP to bottom

I had a jelly roll which split more or less into darkish fabrics and lightish fabrics (EDIT: my jelly roll had two strips of each fabric, if there was just one this would only come out as about 47 x 36".   I added 2.5 yards of black, also cut into 2.5 strips) 

I used 11 light fabrics for the weft: for each one I used TWO  width-of-fabric strip, 2.5 inches wide, cut into six strips each measuring 2.5 x 6.5 inches.  These got labelled A to K.

I used 11 darker fabrics for the warp: for each one I used TWO width-of-fabric (wof) strip, 2.5 inches wide.  

I used black as my background: I cut 22 wof strips from yardage.

From each pair of warp strips, one got paired with two black strips and stitched so it had a black strip each side.  I pressed the seams to the black fabric

The other warp strip of each fabric got cut into 6.5" strips.

I sub cut the black-warp-black strips into 2.5" strips, and matched them with the 6.5" strips of the same fabric.

 And I clipped them together labelled 1 to 11

And breathe - you have done all the prep and are ready to start creating

Starting with the number 1 warp fabric, I took two black-warp-black units, and stitched them to each side of a weft fabric to make a + block.

I repeated with all the odd numbered warps, and press the seams out to the darker fabric

These blocks (above) are becoming the bottom edge of the quilt.  You can now see some of them in the right place.  I now only need to pop the even numbered warp fabrics into place and they are already to be stitched together to make the row.
 

Alternate rows are slightly different:  If you see the top row here it needs a red-with-white-spots warp on the left but it also needs a black-weft-black unit to the very left.

Luckily this row will only need 5 "+" blocks, so once they've been made using the even numbered warp units, and there will be one weft left over.  That one needs to have black top and bottom, and then needs to be sub cut into two 2.5" units which will be the first and last units in the row

Clear as mud?

My head is hurting, so I'm just going to give up typing and go and look at the beautifulness that is my progressing weft and warp weaving quilt :-)

(photographed at 90 degrees, so the weft and the warp are swapped here, sorry)


July 2026

So July has now gone: I always thought August was the hottest month but I really hope not!  I'm happy up to about 25 degrees,  but this ...