Jackie and I made some windowed pouches when she was last here but I found the instructions strange and felt sure there was an easier method, with much less binding.
So I made one differently!
(The previous version)
I plan to make more, so the instructions are here for me, but feel free if you fancy a go!
I cut a piece of vinyl for the window - mine happened to be 16.5" wide by about 6" deep. (Don't go for much narrower or it will be difficult to machine later on) I cut a length of binding 2.5" by 17.5" (width plus 1 inch).
I folded the binding in half along its length, and folded in 1/2" in each side to get rid of the raw edges at the two short ends, and then (using a teflon / non stick foot) stitched the raw edge to one long end of the vinyl
I got a zip that was longer than my 16.5", and cut both ends off in a V shape, then separated the zip into two long halves (I'm only using one half for this).
I folded the binding over to the back of the vinyl (*just* showing through the vinyl) and put one half of the zip behind the binding, with the teeth and about 2mm of zipper tape showing. The zip ends stick out equally at both ends
I top stitched through the folded binding and the zip tape. I actually did three lines to make sure I had caught everything.
I folded the zipped vinyl in half (WRONG sides together) so the two short edges aligned.
I replaced the zipper pull. It's a bit fiddly, but there are YouTubes and other bloggers who explain it well
I cut another 2 lengths of binding: 2.5" x about 7". On one piece I folded one end in to lose the raw edge, and then wonder-clipped the binding to the vinyl, covering the sides of vinyl from the top of the horizontal trim to below the end of the vinyl. The other piece of trim got folded and pressed it in half along its length and opened it up. I then folded the edges in to the middle, folded in half, pressed, and top stitched to make a strap.
I stitched the binding piece to the vinyl, then tucked the strap piece inside the top opening. I folded the trim over to cover the edges of the vinyl and machine stitched it down as far as I could.
The top was far too bulky to machine stitch so I hand stitched it closed and also hand stitched the top closed to keep the strap in place
And breathe!
Next I checked the amount of vinyl remaining visible (ie the width of the pouch). Mine was exactly 16 inches
So I cut lining and outer fabrics width plus 1/2 inches (16.5") wide and sewed them both into tubes (right side together, 1/4" seam allowance). Another time I would line one piece with fusible fleece first
I then upended the zipped vinyl top and clipped the lining and outer fabrics in place to the raw edge of the vinyl, right sides to the vinyl, raw edges all meeting the edge of the vinyl. The side binding just folds flat against the vinyl.
I stitched this seam with about 1/2 inch seam allowance, then flipped both fabrics down and pinned them to each other through the vinyl (with added wadding sandwiched between them). At this size this just fits over the free arm of my machine - any smaller and it would have been fiddly
I top stitched at the top of the fabric, and then carried on quilting in a spiral.
I then needed to create a base. I remember from school that C=2πR, but actually it's much quicker to use this link and input your own circumference. So my radius came to 2.55" (and I should have added 1/2" for seam allowance - doh!)
No pic, but I folded a sheet of paper in 4 and marked just-over-2.5-inches from the folded corner in several places and joined the dots with paper scissors!
I used this template to cut outer and inner fabrics and wadding, and quilted them in a spiral shape
I clipped the circle to the inside-out pouch and, having marked the 1/4s on the pouch and the circle, I wonder-clipped the circle evenly to the pouch the whole way round. I stitched this, then zigzagged it twice. That's no longer a raw edge in my book so no binding needed.
Finally the whole thing gets turned right side out again
and is finished
ready to fill with goodies! By using just one half of a zip it wants to stay open with a more-or-less circular opening, and by having half a zip remaining you just kind of have to make another one!!!
I started this blog for me - it expanded to show BFF Jackie what I was doing - and a few others have invited themselves too - everybody welcome! Mostly about patchwork, with random comments about embroidery, family and life in general, come on in, put your feet up, and I'll put the [virtual] kettle on.
Saturday, April 27, 2019
Monday, April 22, 2019
2019 Wk 16 Easter Sewing
Not as much sewing as I'd hoped as we've been catching up with friends and family too, but I have managed some sewing.
The Australian Starred Hexies are about halfway to a flimsy
I made some personalised Sleep Out Patches for the friends that slept out with me
And made some play shopping baskets for another friend whose church runs the Treehouse cafe during the week
We had Crafty Church on Saturday - lots of ladies in Crochet Corner
Including Rushi who learned how to crochet
And I actually finished a quilt - it's appliqued to a fleece blanket and echo quilted by hand
The Australian Starred Hexies are about halfway to a flimsy
I made some personalised Sleep Out Patches for the friends that slept out with me
And made some play shopping baskets for another friend whose church runs the Treehouse cafe during the week
We had Crafty Church on Saturday - lots of ladies in Crochet Corner
Including Rushi who learned how to crochet
And I actually finished a quilt - it's appliqued to a fleece blanket and echo quilted by hand
Sunday, April 14, 2019
2019 Wk 15 - Playdate with Sharon
Saturday playdate with this lovely lady!
We put the world to rights (of course!) had plenty of coffee, rethreaded the overlocker, cut a quilt for her and speed-dated one for me!
What a way to spend a Saturday!
Sharon has great ambitions for her **SECOND** ever quilt (this was the first) She has pieced a rainbow jelly roll as the front (like this but this is from Pinterest as I forgot to get a pic of hers) but then wanted to make a fractured heart for the back. The pattern was for 2" or 5" squares but we went for 2.5" squares. We had to lay it out in 2 halves
but then used a bit of photo trickery to sort of join them - isn't it going to be awesome!!!! I think I want to make one too!!!
For my project we layed out the EPP plus blocks on her spare bed, and I now just need 15 squares to fill in the gaps and then I'm ready toput them away and ignore them for a while start sewing them together
I have been sewing these starred hexies together, but they don't look any different
And I am all caught up on my Temperature Project. A warm blip is shown by a map of the state of Texas and TX
And the other half - I'm loving the texture of it!
This was the walk to church this morning - isn't the cherry blossom beautiful!!!
And we (the sleepout) was in the local papers!!!!
We put the world to rights (of course!) had plenty of coffee, rethreaded the overlocker, cut a quilt for her and speed-dated one for me!
What a way to spend a Saturday!
Sharon has great ambitions for her **SECOND** ever quilt (this was the first) She has pieced a rainbow jelly roll as the front (like this but this is from Pinterest as I forgot to get a pic of hers) but then wanted to make a fractured heart for the back. The pattern was for 2" or 5" squares but we went for 2.5" squares. We had to lay it out in 2 halves
but then used a bit of photo trickery to sort of join them - isn't it going to be awesome!!!! I think I want to make one too!!!
For my project we layed out the EPP plus blocks on her spare bed, and I now just need 15 squares to fill in the gaps and then I'm ready to
I have been sewing these starred hexies together, but they don't look any different
And I am all caught up on my Temperature Project. A warm blip is shown by a map of the state of Texas and TX
And the other half - I'm loving the texture of it!
This was the walk to church this morning - isn't the cherry blossom beautiful!!!
And we (the sleepout) was in the local papers!!!!
Sunday, April 7, 2019
2019 Wk 14 Chertsey Friday
For a change I wasn't teaching at Chertsey on Friday - I was one of the students instead!
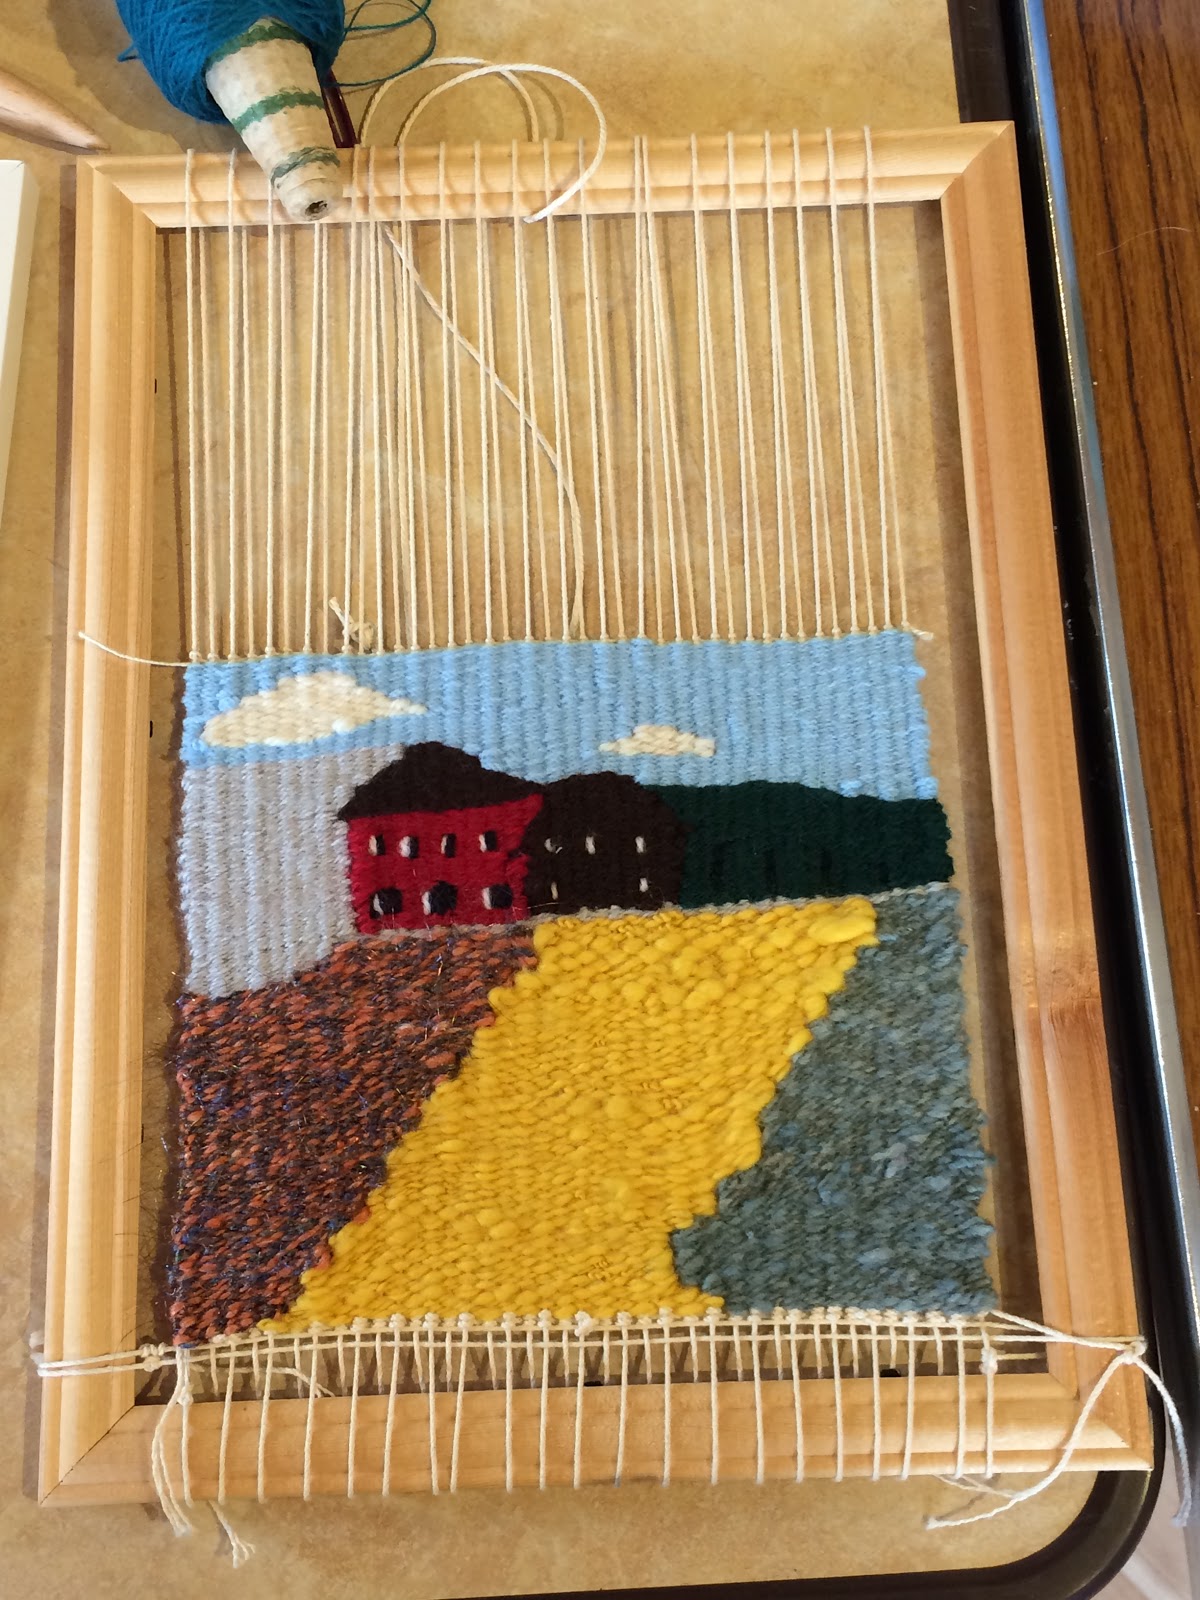
Marion who does these lovely landscape weavingings lead the class instread
She warped the frames for us and we learned pigtail knots, ane which way to weave depending on right or left handedness and how to meet and greet one colour to another horizontally, and how to wrap a length of wool to make it easy to weave. Thank you Marion! We didn't get far on the day but I'm looking forward to seeing them next month for show and tell
And speaking of show and tell, here are some finished or nearly finished wall hangings from last month
After that, I went on to sleep out!! Taking part in a fundraising event for Windsor Homeless Project
My bloggy friends have been really generous in sponsoring me - thank you all VERY VERY much xxxxx
Marion who does these lovely landscape weavingings lead the class instread
She warped the frames for us and we learned pigtail knots, ane which way to weave depending on right or left handedness and how to meet and greet one colour to another horizontally, and how to wrap a length of wool to make it easy to weave. Thank you Marion! We didn't get far on the day but I'm looking forward to seeing them next month for show and tell
And speaking of show and tell, here are some finished or nearly finished wall hangings from last month
After that, I went on to sleep out!! Taking part in a fundraising event for Windsor Homeless Project
My bloggy friends have been really generous in sponsoring me - thank you all VERY VERY much xxxxx
Subscribe to:
Posts (Atom)
July 2026
So July has now gone: I always thought August was the hottest month but I really hope not! I'm happy up to about 25 degrees, but this ...
-
I finally seem to have a month where I can show some making Jackie came over and we went to Festival of Quilts with Lisa and did some sewin...
-
Hi thanks for coming to the new blog!! This week I have been crocheting . . . (no idea why the bottom line isn't straight) I'm lovi...
-
I have a hexies and triangles project I work on at mother-in-law's. I had an idea for an arrangement: there is a blue owl in the centre ...